Introduction: A Legacy of Innovation in Energy Storage
BST (Battery Storage Technologies) has been at the forefront of energy storage solutions for over two decades, driving innovation in battery technology and sustainable energy. Established with the mission to provide reliable and efficient energy storage systems, BST has grown to become a global leader in the field. Our cutting-edge products are designed to meet the needs of both residential and commercial users, providing unmatched reliability, performance, and safety.
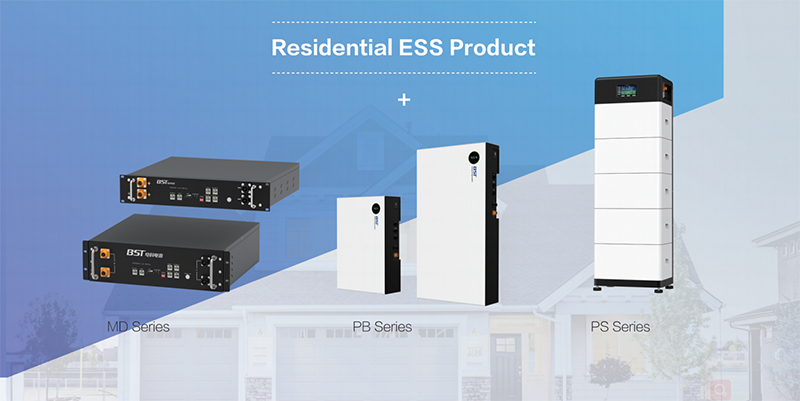
BST’s strengths lie in our commitment to research and development, with a focus on creating products that are not only technologically advanced but also user-friendly. Our storage batteries, like the PB2 series, are built to deliver exceptional energy storage capabilities, ensuring stable power supply even in the most challenging environments. By choosing BST, you are investing in a product backed by years of expertise, rigorous testing, and a dedication to excellence in energy storage technology.
Safety Precautions
- Read the Manual: Before starting, thoroughly read this entire guide and any provided manuals. Familiarize yourself with safety instructions and warnings.
- Turn Off Power: Ensure the main power supply is turned off to avoid electrical hazards.
- Wear Protective Gear: Use insulated gloves, safety glasses, and any other necessary personal protective equipment (PPE) while handling electrical components.
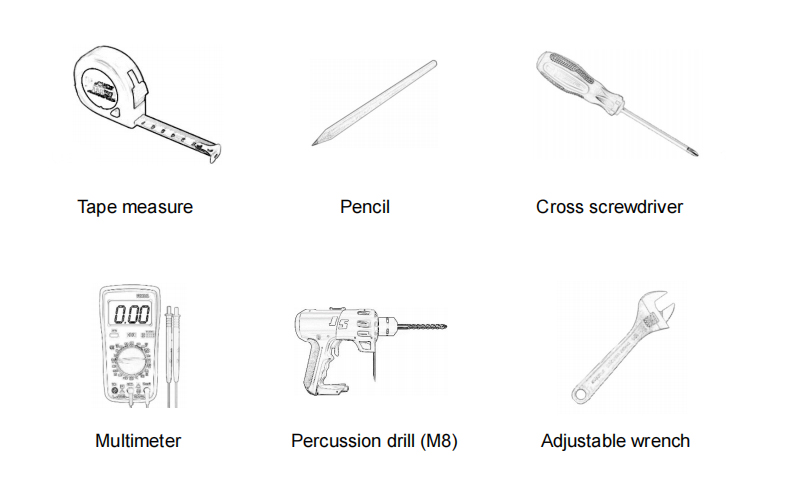
Tools You Will Need
- Tape Measure
- Pencil
- Cross Screwdriver
- Multimeter
- Percussion Drill
- Adjustable Wrench
- Level
- Wall Anchors (if mounting on drywall or masonry)
- Voltage Tester
Step 1: Prepare for Installation
- Gather Tools and Materials: Before you begin, gather all necessary tools and materials. Ensure you have the tape measure, pencil, cross screwdriver, multimeter, percussion drill, adjustable wrench, and other required tools ready at your work site.
- Safety Check: Double-check that you have all safety gear in place, including gloves, glasses, and any additional protective equipment specific to your environment.
- Clear the Area: Ensure the installation area is clean, free of debris, and well-lit. This will help prevent accidents and make the installation process smoother.
Step 2: Choose the Installation Site
- Location Requirements:
- Ensure there are no flammable or explosive materials nearby.
- The ambient temperature of the site should be within the range of -10°C to 50°C. The performance and lifespan of the battery can be adversely affected by extreme temperatures. If the ambient temperature exceeds this range, the PB2 battery will enter a protection state and stop working.
- The battery must be installed on a horizontal floor or wall capable of supporting its weight.
- The distance from the air outlet of the inverter should be more than 0.5 meters.
- The battery should be installed under the eaves indoors (such as in a garage or basement) or outdoors in a location that avoids direct sunlight and water immersion.
- Suggested Site Characteristics:
- The installation area should be dry, well-ventilated, and free of corrosive gases.
- Choose an area with minimal dust and dirt.
- Install the product in a location where children and animals cannot reach it.
- Temperature Considerations:
- The ambient temperature range for optimal operation is -10°C to 50°C.
- Avoid exposing the battery to harsh temperatures, as frequent exposure may reduce its performance and lifespan.
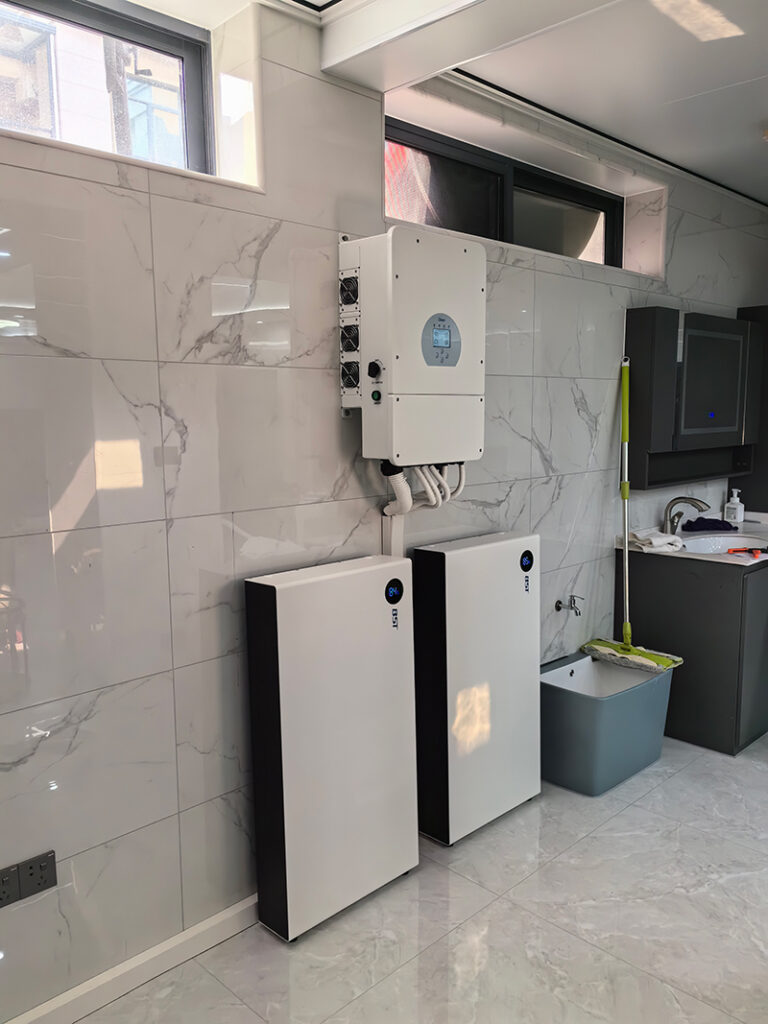
Step 3: Installation Method
- PB2-5.1 Installation:
- Wall-Mounted Installation:
- The PB2-5.1 supports both floor and wall-mounted installation. When wall-mounting, ensure the wall is capable of supporting the weight of the PB2-5.1 and its accessories. The wall should have a minimum strength of 17 MPa (concrete) or 10 MPa (masonry).
- If the PB2-5.1 is installed on the floor, it must also be fixed to the adjacent wall to prevent movement or tipping.
- Floor-Mounted Installation:
- If installing on the floor, ensure the surface is level and capable of supporting the battery’s weight. The fixing bracket provided is for additional stability and to prevent tipping.
- Wall-Mounted Installation:
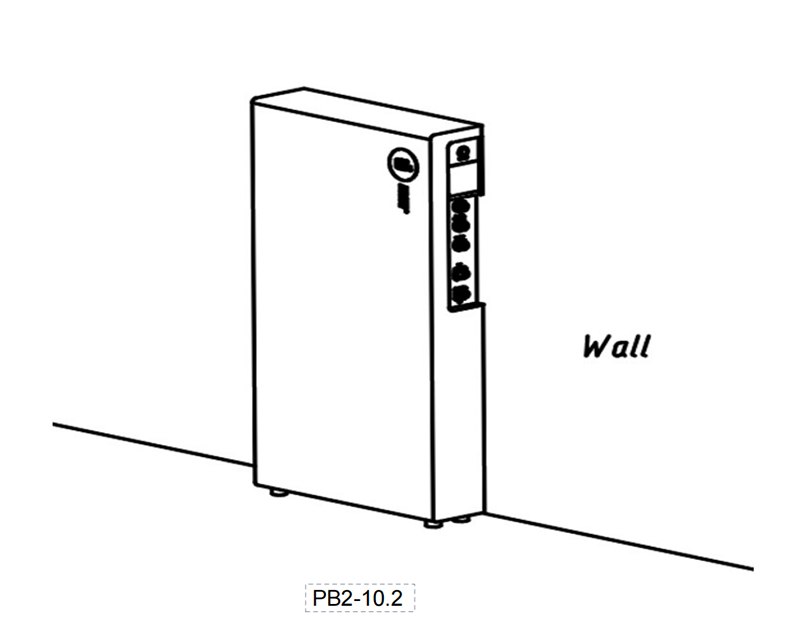
- PB2-10.2 Installation:
- Floor-Mounted Installation Only:
- The PB2-10.2 model only supports floor-mounted installation. The floor must be able to support the weight of the PB2-10.2 and its accessories.
- The fixing bracket provided is intended solely to prevent tipping, and the floor should be capable of supporting the full weight of the unit.
- Floor-Mounted Installation Only:
Step 4: Mount the Wall Bracket
- Mark the Mounting Points:
- Use the mounting bracket as a template to mark the positions of the holes on the wall with a pencil. Ensure the marks are level and correctly spaced according to the bracket design.
- Drill the Holes:
- Use a percussion drill with an appropriate bit to drill holes at the marked points. The type of drill bit used will depend on the wall material (masonry or drywall).
- Install Wall Anchors (if necessary):
- If mounting on drywall or masonry, insert suitable wall anchors into the drilled holes to ensure a secure hold.
- Secure the Bracket:
- Attach the wall bracket using screws and a wrench. Double-check with a level to ensure the bracket is straight and securely mounted.
Step 5: Mount the Battery
- Lift the Battery:
- With the help of another person, carefully lift the battery and align it with the wall bracket.
- Secure the Battery:
- Hook the battery onto the bracket, ensuring it clicks into place and is securely mounted. Double-check that the battery is stable and does not move.
Step 6: Electrical Connections
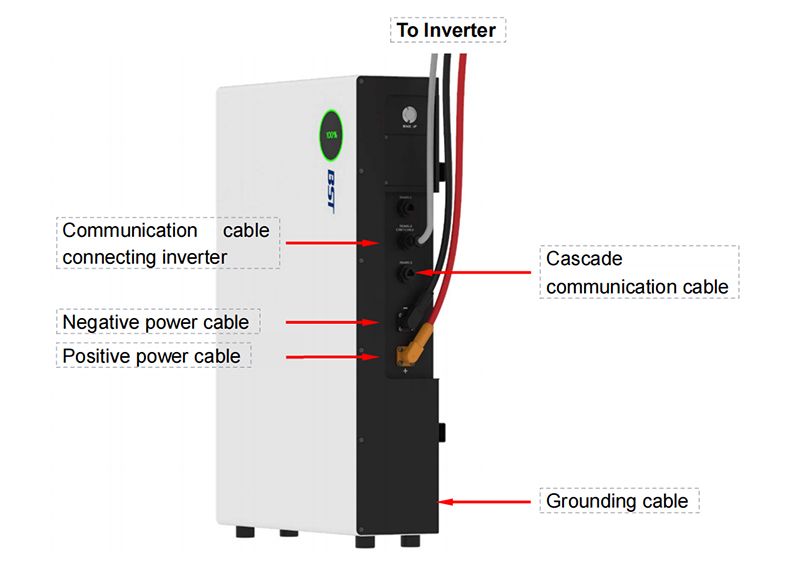
- Connect the Power Cables:
- Attach the battery’s power cables to the main power supply. Follow the color-coding or labeling to ensure proper connections (positive to positive, negative to negative).
- Check Tightness:
- Ensure all connections are tight and secure using a wrench.
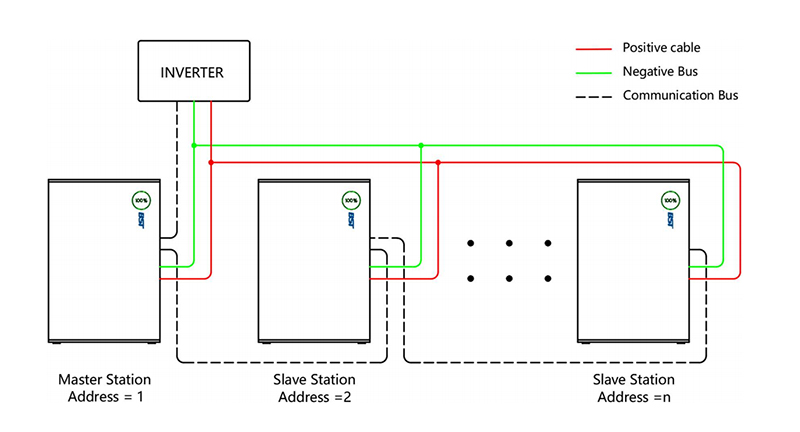
- Connect the Communication Cables:
- If applicable, connect any communication cables to integrate the battery with your solar inverter or energy management system.
Step 7: System Configuration
- Turn on the Power:
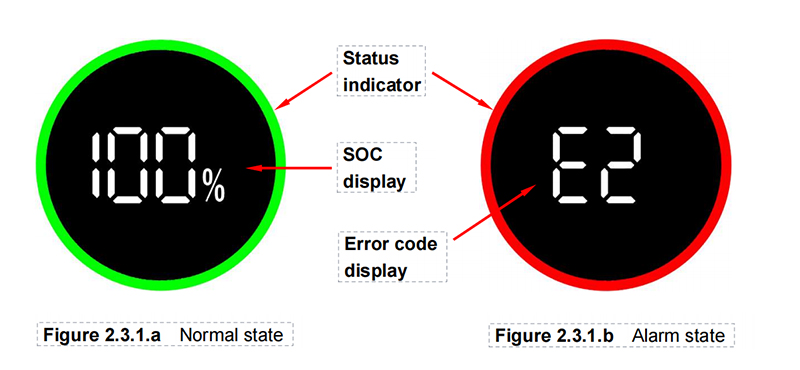
- Restore power to the system. The battery should power up, as indicated by LED lights or a display panel.
- Configure the Battery:
- Use the provided user interface to configure the battery settings according to your system requirements.
- Check for Errors:
- Verify that there are no error messages or warning indicators on the display.
Step 8: Testing and Verification
- Test the System:
- Run a test to ensure the battery charges and discharges correctly. Use a multimeter or voltage tester to check outputs.
- Monitor for Stability:
- Observe the battery’s performance for a short period to ensure it operates smoothly and without issues.
Step 9: Final Steps
- Secure All Covers:
- Ensure that all terminal covers are securely replaced.
- Clean Up:
- Clean up the installation area, removing any debris or tools. Ensure the site is safe and free from hazards.
- Review Maintenance Tips:
- Familiarize yourself with regular maintenance procedures, such as checking for loose connections and monitoring battery health.
Conclusion: The Importance of Proper Installation and BST’s Commitment to Quality
Installing a BST wall-mounted storage battery is a significant step toward enhancing your energy independence and reliability. However, the key to ensuring that your investment performs optimally lies in carefully following the installation guide. This detailed guide has been designed to walk you through each step, ensuring that the battery is installed safely, securely, and in a manner that maximizes its performance and longevity.
Carefully reading and adhering to this guide not only safeguards the performance of your battery but also ensures the safety of your home and loved ones. The PB2 series is a product of BST’s extensive experience and commitment to quality in the field of energy storage. Our batteries are built to provide robust, reliable, and efficient energy storage solutions, designed to meet the highest safety and performance standards.
By choosing BST, you are choosing a partner dedicated to advancing energy storage technology and delivering products that empower users worldwide. We are here to support you every step of the way, from installation to maintenance, ensuring that your energy needs are met with the highest level of reliability and satisfaction.
For any further assistance or questions, please contact BST support at [info@bstess.com]. Thank you for choosing BST.
This guide now includes a comprehensive introduction to BST wall-mounted storage battery, a detailed installation process, and a strong conclusion emphasizing the importance of following the guide.